Author: AOD

How To Get Better Google Search Results – Tips & Examples

Basic and Advanced Operators.

Google-Search-MagnifiedA lot of people would be surprised if they knew how much of a powerful tool Google can be. Stats are showing that the biggest percentage of users, actually don’t know how to perform a well-executed search on Google! Google provides all the neccesary tools in order to help you find almost anything you want in the web. In addition, even people or web developers who own a website could improve their site management or SEO tactics by using those same simple tools, known as operators!

Here is a list, with tips and tricks, to help you improve your search results in Google:

Basic Operators.

Before start using those “tools”, keep in mind, that although Google is not case-sensitive when you are typing in a word or a phrase (color = CoLOR , for example…), it becomes case-sensitive when you use those operators:

1. Double Quotes
Including one or more words into double quotes [ “” ], means that you want your search results to include exactly these words in that specific order. Including only one word can make you avoid synonyms, you didn’t want to appear in your results in the first place.
Example: [ pizza “margherita” ].

2. OR
By using this operator between two words, you actually looking for results that may include either one of those words. Without it, Google would search for results including BOTH words. This is quite useful, especially when you are looking for annual events, stats, etc.
Example: [ Chicago Bulls 2008 OR 2011 ]

3. Minus
Using the minus sign ( – ) immediately before a word, means that pages that contain this word, will be excluded from your results.
Example: [ pizza -margherita].

4. Wildcard
An asterisk [ * ] inside a search query, symbolizes an unknown term that Google will try to replace with the best possible match.
Example: [ pizza with * ].

5. Tilde
This symbol [ ~ ], if placed immediately before a word, can bring results relative to the search term and synonyms.
Example: [ ~football ].

6. Number Range
[ .. ] Shows all results in a specified range of numbers.
Example: [ 1..4 minutes ].

Advanced Operators

7. Definition
Using [ define: ] and a word after it, returns the definition of this specific word.
Example: [ define:web ].

8. File Types
[ filetype: ] Followed by a file type, returns links to relative file formats.
Example: [ nameofbook filetype:pdf ].

9. Site Related
This [ site: ] operator, followed immediately by your domain name, will bring up all your websites pages that have been indexed by Google.
Example: [ site:yourdomain.com ].

10. Backlinks
[ link: ] Followed by your website’s domain name can show you all the backlinks your site is getting. Unfortunately it will only show up links from websites with pagerank 3 and above. Example: [ link:yourdomain.com ].

11. Cached Pages
[ cache: ] Followed by your domain’s name can give you the cached version of your website.
Example: [ cache:yourdomain.com ].

12. Relative
[ relative: ] Immediately followed by your website’s domain name, can bring up relative websites (at least this is what Google thinks…).
Example: [ relative:yourdomain.com ].

13. Webpage Information
By using [ info: ], followed by your website’s domain, gets you a list with all the above operators, site:, link:, cache:, relative:, and “yourdomain”.
Example: [ info:yourdomain.com ].

14. Specific Locations
You can search into a specific URL, title, text or anchor text for a word, by using [ inurl: ], [ intitle: ], [ intext: ], and [ inanchor: ]. Note that this way you search for only one word (the first of the query). If you want to search an entire phrase you should use [ allinurl: ], [ allintitle: ], [ allintext: ], [ allinanchor: ] with the exception that these last operators cannot be combined with others.
Example: [ site:artofdeveloping.com intitle:Google ] or [ allintitle:Google new service ].

15. Google Advanced Search
If for whatever reason you cannot remember any of those operators, you can always use Google Advanced Search.

Extra

Here are some extra terms you could use in order to find out about the time, the weather, the stockmarket and more.

Google As A Simple Calculator Or A Unit Converter.

Note that by using these symbols you can convert Google into a simple calculator +, –, *, /, %, ^. You can also use sqrt(), sin(), cos(), arctan(), tan(), ln(), log(), !.
Example: [ ((3+2)*4)^2 ].

You can also use Google search in order to convert any unit into another.
Example: [ 5 cm in inches ].

One Last Thing..

Keep in mind that these operators may change at any time.The AND, + operator for example is no longer in use.
You could also visit Google help for more information.


Humans.txt – A File For Websites Made By Humans…

humans-txtSometimes people forget that websites are not something that just appears out of nowhere, nor are created automatically by some kind of robots…. There’s a lot of work that needs to be done every time and a number of people behind it that should take the credit for all this work.

This is why humans.txt was created! The idea came from a Spanish group of web developers: Juanjo Bernabeu, Maria Macias, Carlos Mańas,Abel Cabans and Abel Sutilo. These are the same people who decided to create the humanstxt.org website, in order to further promote the whole idea, the motto of which is “We Are People, Not Machines”.

What Is Humans.txt.

Like robots.txt, humans.txt is a simple text file, placed in the root folder of a website, that provides information about the site and the people that created it. The main difference from the robots.txt is that, humans.txt is designed exclusively for humans in contrast with the former which is meant to be used only by search-bots.

Why Use It?

Freelancers that are temporarily hired by companies in order to create a website, often have great difficulties in establishing their authorship. There are times when companies don’t want the names of those people, for whatever reason, to appear in the same website that THEY created (and this is not ethically right, at the very least…).

Even when you are the owner of a small company, consisting of 2 or 3 persons, why not to be able to present some information about each of those people separately? You could introduce the developer/s, the designer/s, SEO expert/s, or even those people that may had contributed with their ideas or played a particular role in the completion of a project (after all, they deserve to be thanked too!).

Finally, you could consider this as a way to give a more personal or more “human” dimension to your websites (your own and those made for others). Even big companies, such as Google, have their own humans.txt file!

How To Use It.

It is a very easy process really. Just open your notepad and write about your website, the people that are behind it or give thanks to all those people that contributed. You can do this in whatever way you like (after all, this is only simple text we are talking about, not some kind of code) and upload it to the root folder of your site.

In order for humans.txt to become a standard though, there are some guidelines that it would be good to be followed. Abel Cabans has created a great example for the humanstxt website:

/* TEAM */
Your title: Your name.
Site: email, link to a contact form, etc.
Twitter: your Twitter username.
Location: City, Country.
...

/* THANKS */
Name: name or url
...

/* SITE */
Last update: YYYY/MM/DD
Standards: HTML5, CSS3,..
Components: Modernizr, jQuery, etc.
Software: Software used for the development

The last thing you need to do, is to include this link into the <head> tag of the site:

<link rel="author" href="humans.txt" />

More Information.

To learn more about humans.txt, visit http://humanstxt.org/.
or you could download the Mozilla add-on: https://addons.mozilla.org/firefox/addon/humans-txt/


Vector VS Raster Graphics

2 Different Types Of Graphics.

Vector-VS-Raster-GraphicsIf you ever tried to create some web graphics, posters or logos, then you’ve probably came across terms like “vector” or “bitmap” (also known as “raster”). These are the two basic types for creating any kind of graphics. Even if you didn’t know it at the time, it is certain that you worked with at least one of those types.

Photoshop, for example, is the most common raster-based program in the market, so every time you use Photoshop, you work with bitmaps and pixels. In a similar field, Illustrator and Corel Draw are the most common vector-based programs, where you have to work with points and paths.

This article is based in the usage of these two graphic types as it certainly makes a difference how and when you use them.

Terms.

Knowing your work tools will “pay you back” eventually, at least this is what I think. This is why it is important to take a closer look into those two types.

Raster Images or bitmaps are created by a number of pixels placed next to each other in a grid. A pixel is a single colored dot. Many pixels combined, create the image that you see (as the picture above).

Vector-GraphicsVector Images can be created by the usage of mathematical definitions exclusively. Every shape is ultimately a series of points connected by lines and represented by pure mathematical types. (All you have to know in order to draw a simple square, for example, is that it consists of four points that are connected and placed in a specific position.)

Advantages & Disadvantages.

Raster Images

(+) The main advantage of raster images is based on the way a raster image is created. This vast number of pixels can create “continuous tone” images such as photographs. The amount of detail a bitmap image can have, depends on the resolution of the image (how many pixels/dots exists in an inch).

The standard resolution for printing is 300 dots per inch (300 dpi), when 72 dots per inch is the resolution for displaying an image in a computer monitor (72 dpi).

Scaled-Raster-Image(-) One of the main disadvantages of bitmaps images is that, the more you enlarge it, the more the image loses its quality and pixels become visible. This is known as “Pixelation”.

(-) Another disadvantage of raster images is that the bigger the resolution of an image is, the bigger the size of this image becomes.
Bitmap images are used widely in the web and it is also a common methodology for developers to optimize the images they use by compressing them. This is done, mainly in order to prevent a webpage from exceeding an “appropriate” size (at this time an average of 500 Kb is probably fine).

Vector Images

(+) Scalable Vector Images, as the name suggests, give you the ability to enlarge or shrink them at any size, without any loss of quality,

(+) they create small file sizes but…

(-) vector graphics, cannot reproduce continuous tone images the way bitmaps can.

Way of Use and Common Formats.

As we already mentioned, raster graphics are mainly used in photography and in the web. Some known raster formats are: BMP, GIF, JPEG, JPG, PNG, PICT (Macintosh), PCX, TIFF.

Vector Graphics are mostly used for designing logos or any combination of shapes that can be used for business cards, posters or any kind of graphics that eventually will be “sent” to a printer.
Some known vector formats are: EPS, AI, SVG, SWF, PDF, DFX, CDR, or DWG.

Generally, it is a good practice, to design any kind of logo as vector and then converting it into a raster format. The most common reason for doing this, is the ability to rescale the image and re-print it at once, without any loss of quility.

It is worth to be mentioned that, each type of graphics can be converted to the other and vice-versa. Converting a vector image to raster is by far an easier process and with no particular problems in it.

Adobe Illustrator can do both. You can save your file as png, jpeg or any other format in order to “rasterize” your shape or you can “vectorize” your bitmap image by “outlining” it.

Conclusion

There is no right or wrong type for graphics. Either one has its advantages and disadvantages. You just have to know when and what to use. There will be times when you may need to combine both of those types at the same file!

If you learn how to use them right, I’m sure you are going to benefit even more by them.

CSS Hacks & Modern Browsers

*Note: Possibly outdated but i kinda miss those days…

That One Browser That Always Gives You Trouble.

How many times you found yourself trying to understand why, among all the modern browsers in the world, there must always be one that just doesn’t get it right! I know, I know… things can’t always be perfect and you’ve probably started thinking about Internet Explorer until now, but that’s not always the case.

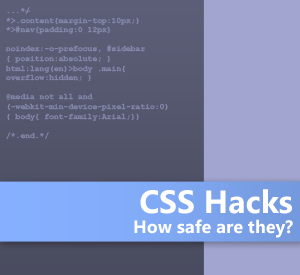
CSS-hacksCSS HacksThere are times when, even modern browsers seem to have their differences about how to treat a CSS property. It is a very rare thing, but still, happens! This time may be Opera; next time could be Chrome or Firefox, this one browser that just, will not seem to care about that margin property of yours.
So, how are you going to fix this? You have, somehow, to be able to target each and every one of those browsers alone. Well, the solution to your problems is known as “CSS Hacks”. Of course, in this world there is always a catch, so let’s take it from the top.

Targeting & Filtering.

The logic of CSS hacks is based on two different ways of processing. You can either “target” a specific browser, in order to apply the change only to that, or “filter” a group of browsers, in order to apply the change to them, leaving one specific browser out.

The following examples are only a small part of the existent hacks and not all of them are validated as CSS.

1. Target Firefox Only.

/*Target all versions of Firefox*/
@-moz-document url-prefix(){.yourclass{ yourproperty:value; }}
/*Target all versions of Firefox & Gecko*/
*>.yourclass { yourproperty:value;}
/*Target Firefox 1.5 and newer*/
.youclass, x:-moz-any-link, x:only-child { yourproperty:value; }

2. Target Chrome & Safari.

/*Target webkit browsers - All versions of Chrome & Safari*/
@media screen and (-webkit-min-device-pixel-ratio:0) {.yourclass{ yourproperty:value; }}
/*or*/
html:lang(en)>body .yourclass{ yourproperty:value; }

3. Target Opera Only.

/*Target Opera 10 and newer*/
@media not all and (-webkit-min-device-pixel-ratio:0) { .yourclass{ yourproperty:value; }}
/*or*/
noindex:-o-prefocus, #yourid { yourproperty:value; }
/*Target Opera 9 and older*/
html:first-child #yourid { yourproperty:value; }

Although the older versions of Internet Explorer don’t fall into the “modern browser” category, here are some well-known ways to target those old versions.

4. Target IE 5.5, 6 Or 7

/*Target several IE versions*/
#yourid
{
*property: value; /*IE 7*/
_property: value; /*IE 6*/
property/: value; /*IE 5.5*/
}

Proceed With Caution!

Unfortunately, even if all of the above “solutions” work as expected today, there is no assurance on how they will behave in the future. In general, try to avoid the usage of similar hacks, as they are based in constantly updating standards.
For example, here is a hack that was meant to work only with Safari 3 and Chrome:

body:nth-of-type(1) .yourclass{ yourproperty:value; }

This is now valid for all modern browsers… nice!

So, every time you are about to hack your way through your CSS code, you must make sure that you’ve already checked for every possible, valid solution. Think it over and try not to mess things up by adding more complicated or “unstable” code into your style sheet.

In case you can’t avoid them, at least try to minify the hacks needed, by targeting as fewer browsers as possible. Finally, always remember that it is safer to hack an older/dead browser than a modern/live one!